Ensuring your forms capture high-quality leads can be challenging when users enter personal email addresses like Gmail or Yahoo. This step-by-step guide will show you how to validate email fields in Unbounce to ensure:
- Users are prompted to use a work email address.
- The form shows an error message if the email domain is invalid.
- Users can proceed after being prompted once, even with a personal email.
Why I Created This Solution
A while back, someone in the Unbounce community posed a question: “How can we ensure people use work emails instead of personal ones like Gmail, without completely blocking submissions?”
Their concern was valid—marketers want leads that are tied to businesses, not just casual browsers. However, most solutions were too rigid, forcing strict validations that could frustrate users.
This inspired me to create a more flexible approach. The solution I’m sharing here combines regex validation with dynamic JavaScript to strike a balance between quality and user experience.
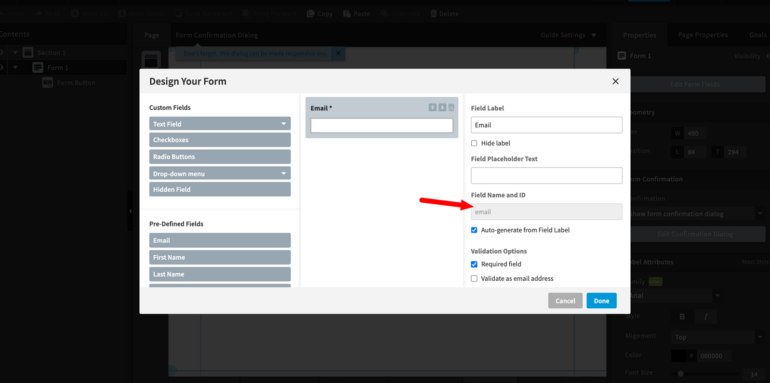
Step 1: Set Up Your Email Field in Unbounce
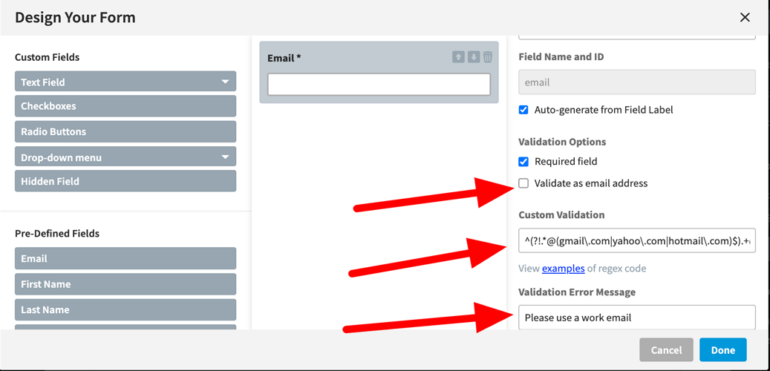
Step 2: Add Custom Validation for Regex
Select the email field.
Under the Validation section, enable the
Custom Validationoption.Paste the following regex:
^(?!.*@(gmail\.com|yahoo\.com|hotmail\.com)$).+@.+\..+$
This ensures Unbounce blocks personal email domains like Gmail, Yahoo, or Hotmail.
You can also update the message under the “Validation Error Message” field.
Step 3: Add JavaScript for Dynamic Behavior
- Click on the Javascripts tab in the editor (bottom left corner).
- Add a new script and paste the following code:
- The code placement setting should be “Before the Body End”.
					<script>
  document.addEventListener('DOMContentLoaded', function () {
    const emailField = document.querySelector('#email'); // Replace with your email field ID
    const form = document.querySelector('form'); // Replace with your form selector
    let invalidSubmissionCount = 0;

    const blockedDomains = ['gmail.com', 'yahoo.com', 'hotmail.com']; // Add more domains if needed
    const errorMessage = 'Please use your work email address.'; //Change the text to replace error message

    form.addEventListener('submit', function (event) {
      const emailValue = emailField.value.trim();
      const emailDomain = emailValue.split('@')[1];

      if (invalidSubmissionCount === 0 && blockedDomains.includes(emailDomain)) {
        event.preventDefault();

        // Display error message
        if (!document.querySelector('.email-error')) {
          const errorDiv = document.createElement('div');
          errorDiv.className = 'email-error';
          errorDiv.style.color = 'red';
          errorDiv.style.marginTop = '10px';
          errorDiv.textContent = errorMessage;
          emailField.insertAdjacentElement('afterend', errorDiv);
        }

        invalidSubmissionCount++;
      } else {
        // Allow the form to proceed
        const errorDiv = document.querySelector('.email-error');
        if (errorDiv) errorDiv.remove(); // Remove error if user proceeds
      }
    });
  });
</script>
This script dynamically validates email addresses. Users will see an error message only on the first invalid submission.
Step 4: Test Your Form
- Preview your Unbounce page.
- Enter a personal email like test@gmail.com. You should see an error message prompting you to use a work email.
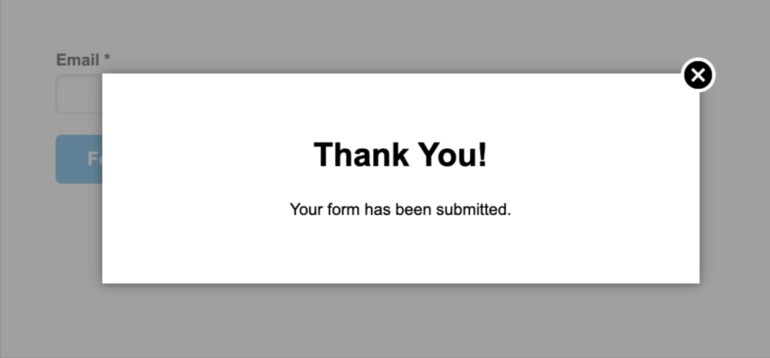
- Enter a valid email like user@company.com. The form should proceed without issues.
- Retry with a personal email after the first invalid attempt. It should allow submission.
Bonus Tip: Customize the Error Message
To personalize the user experience, you can update the error message text in the script:
const errorMessage = 'Please use your company email to proceed.';
Conclusion
This solution is perfect for marketers who want high-quality business leads without frustrating users. The combination of regex and JavaScript ensures invalid emails are flagged while giving users the flexibility to proceed after the first prompt.
If you want to supercharge your Unbounce pages with modern, refreshing templates that save time and maximize conversions, visit TemplatesForest.com.
We offer over 70+ customizable Unbounce templates designed for your needs. Transform your landing pages today!
Let me know your thoughts or share your own hacks in the comments below!
To get 14-Days FREE trial and 20% OFF for the first 3 months on your Unbounce account, please click here.


